
A small dorm desk has two jobs that fight each other. It should feel like yours, and it should still have room for an open notebook, a laptop and your elbows at 11pm before an exam. Most dorm desk decor ideas solve the first job and quietly wreck the second.
This guide does it the other way round: protect the study space first, then decorate around it.
Read your hall’s rules first#
Before you mount, stick, clamp or move anything, read your school’s housing policy. The rules are not the same from one campus to the next, and sometimes not even between buildings:
- UMass Amherst allows removable strips, hanging putty and painter’s tape, but says one residential area should bring pushpins instead because Command strips aren’t permitted there.
- Mary Washington lists 3M Command Hooks and adhesive-backed LED strips as prohibited, because of wall damage.
- Western Kentucky bans adhesives of any kind on drywall, “drywall-safe” strips included, and says no adhesives on furniture.
- Michigan Tech, UMass and Mary Washington all say the furniture provided has to stay in the room.
So nothing below assumes an adhesive, clamp or hook is allowed where you live, or that it comes off clean. Where a layout depends on one, it says so and points you back to your policy.
The no-purchase reset#
Do this before you buy anything. It’s free and it tells you what you actually need.
- Clear the desk completely. Everything off, including the things that “live” there.
- Mark the notebook zone. The patch directly in front of your chair, wide enough for an open notebook. Nothing goes back there.
- Put back only daily items. Laptop, charger, one pen cup, the lamp. Everything else goes to a shelf, a drawer or a bin under the bed.
- Raise the laptop with what you own. A stack of hardcover textbooks works. Higher screen, and the space underneath becomes a shelf.
- Use the furniture’s built-in storage. If the desk came with a hutch or a desktop bookshelf, that’s your vertical space. Use it before buying a riser.
- Move things the rules allow you to move. Reposition your own items freely. Moving the desk or bed itself may be restricted, so check the policy above first.
Three small dorm desk layouts#
Each one keeps the notebook zone in front of the chair. The photos are illustrations made for this page, not measured setups or real rooms.
Layout 1: laptop only#

The laptop goes back and up, on a stand or a stack of books, so the front of the desk stays open. Lamp in one back corner, one personal item in the other, charger cable run straight over the back edge instead of across the desk. If you type a lot on a raised laptop, an external keyboard helps.
Layout 2: laptop plus monitor#
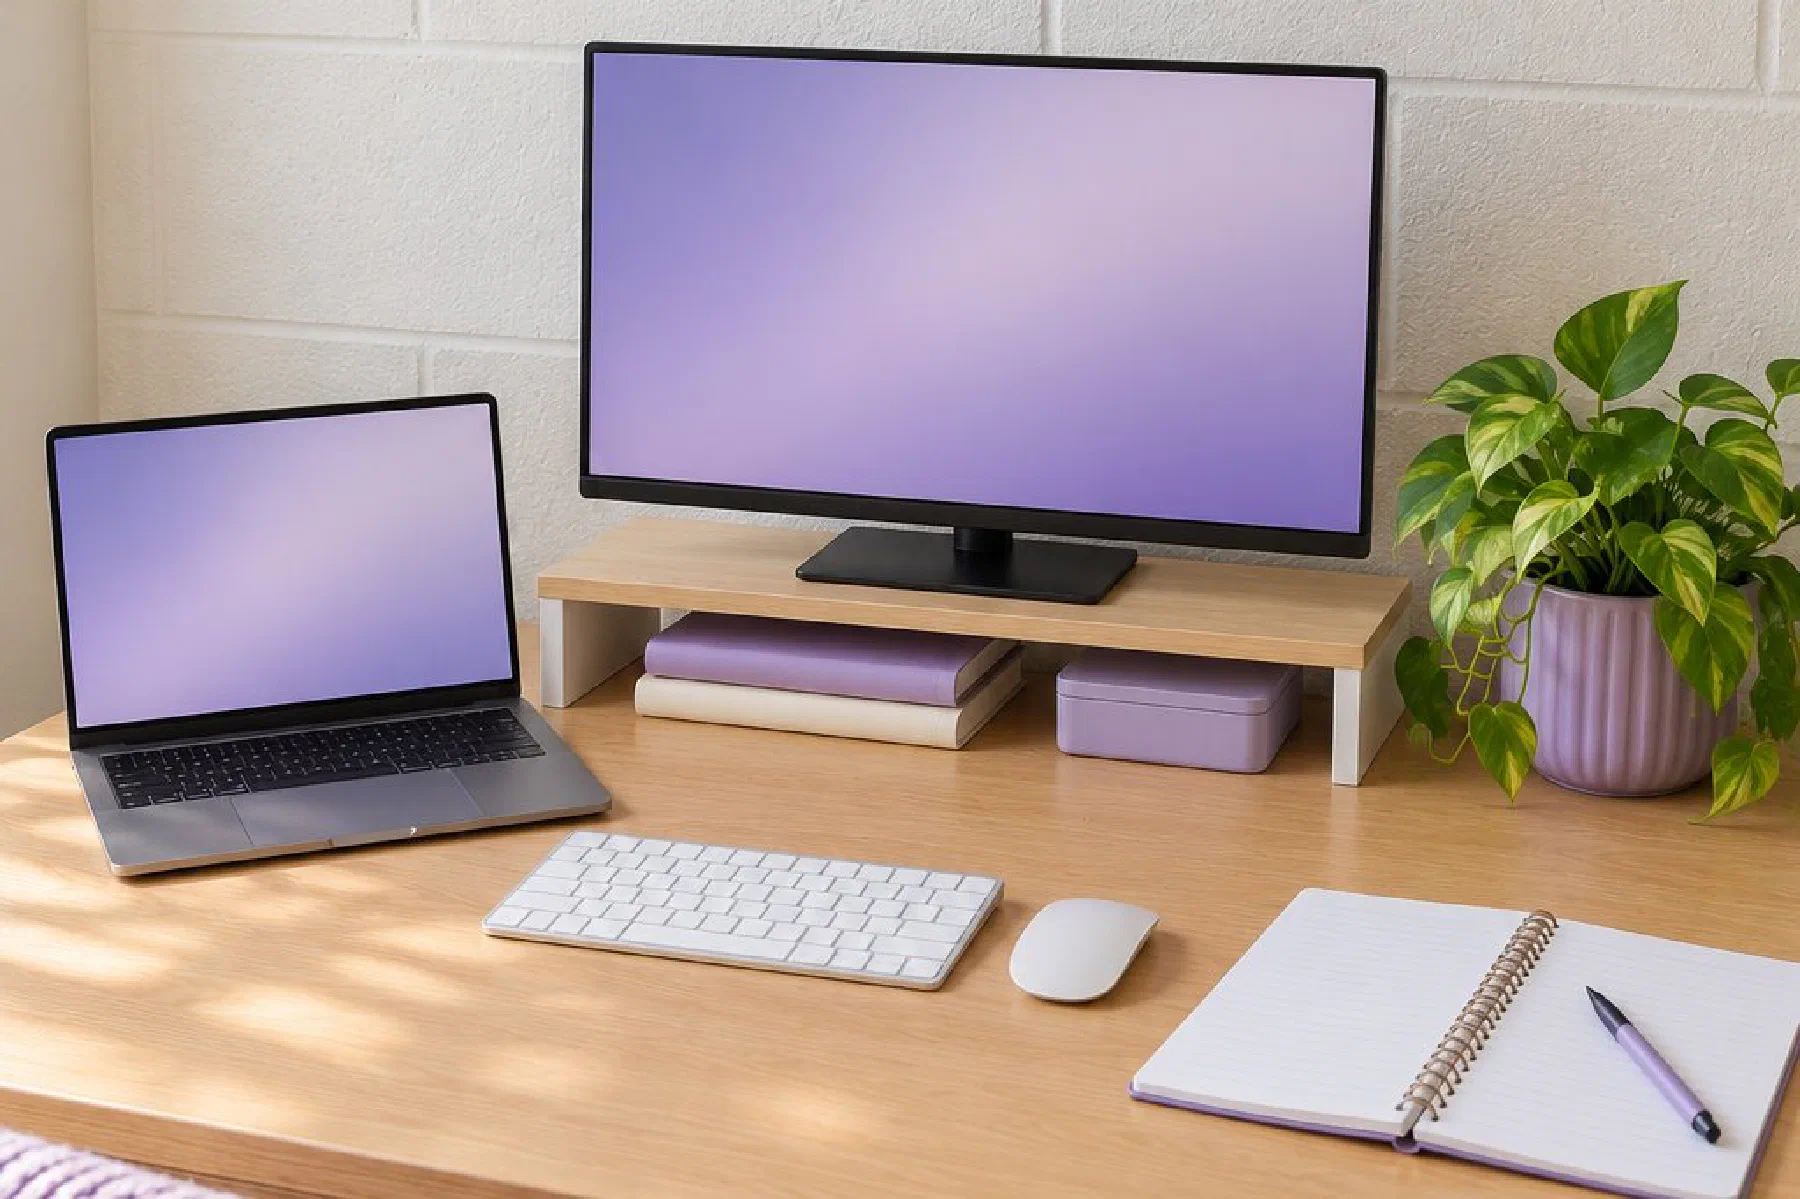
The monitor sits on a riser at the back, and the space under it holds what used to sprawl across the desk. The laptop goes to one side as a second screen. Keyboard in the middle, the notebook zone beside it on your writing-hand side. Cables run up and behind the riser.
Layout 3: a desk that can’t take a clamp#
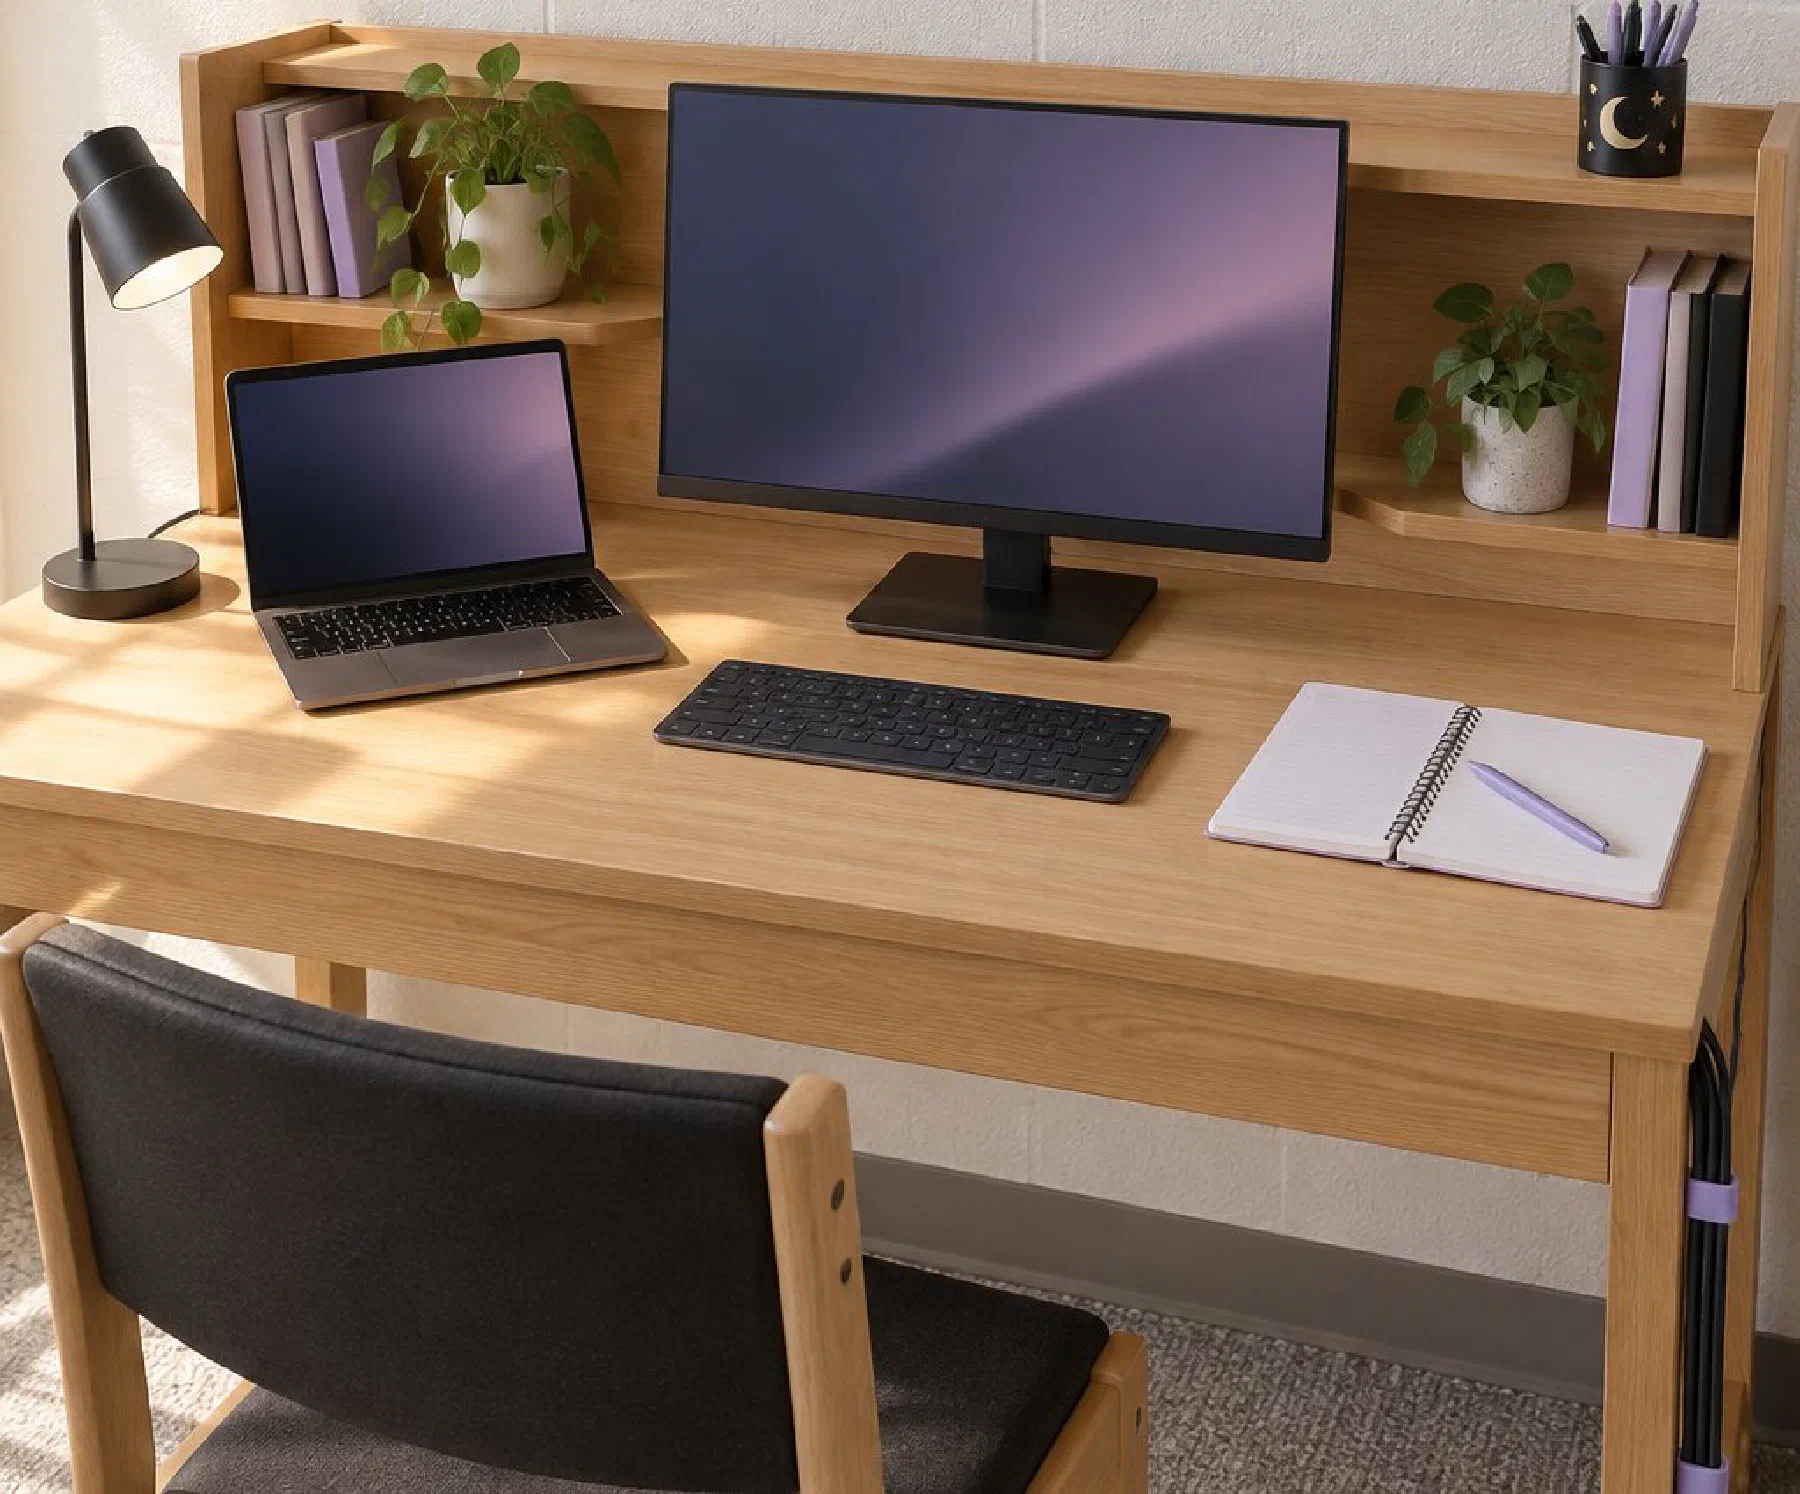
Lots of dorm desks have a built-in hutch, a lip or a drawer where a clamp would go, or rules against attaching anything. Here, nothing attaches: the monitor stays on its own stand or a freestanding riser, the lamp stands on its own, and cables are gathered with removable hook-and-loop ties rather than adhesive.
Light, cables, storage and one personal touch#
Lighting. Put a desk lamp at a back corner, on the side away from your writing hand, so it doesn’t cast your hand’s shadow across the notebook. Check bulb rules: Brown prohibits halogen desk lamps, and Kutztown prohibits incandescent and halogen bulbs and recommends LED. The U.S. Fire Administration’s college student guidance says to keep lamps and bulbs away from anything that can burn, so keep bedding and curtains clear of the lamp.
Cables. Route charger cables up and over the back edge, not across the desk. USFA names overloaded power strips among the causes of fires in college housing and says to use only strips with internal overload protection. Some schools go further: Brown allows only grounded, 15-amp-rated surge protectors as extension cords, and Kutztown forbids plugging one power strip into another. Check yours before buying one.
Under-monitor storage. A riser’s real value on a dorm desk is the shelf underneath it. That gap holds a keyboard at night, a notebook stack, or chargers. If you only have a laptop, the books under it are doing the same job.
One personal touch. Pick one thing for the desk itself: a photo, a small plant, a mug you like. Put it in a back corner, not the front. Posters and the rest of the personality can go on the wall, using only what your hall allows. Several schools also cap how much wall you can cover, so read that rule too.
Arm or riser: the short version#
This is the decision in five checks.
- Monitor compatibility. An arm needs VESA holes on the back of the monitor and a weight inside the arm’s range, including the minimum. For example, the Ergotron LX’s listing gives VESA 75×75 and 100×100 and 7 to 25 lb. Enter your monitor’s numbers in the monitor arm fit checker.
- Desk-edge thickness. Each clamp has a range. The Ergotron LX’s clamp is listed for desks 0.4 to 2.4 inches thick. Measure yours.
- Clamp clearance. The clamp needs an open edge with nothing underneath: no drawer, rail, lip or hutch in the way. Layout 3 is the desk that fails this.
- Stability. A clamp concentrates load on one edge. On a light or wobbly desk, a riser that spreads the weight is the calmer choice.
- Positioning. If you need to move the screen often, an arm wins. If it never moves, a riser is enough and gives you storage too.
And above all of those: whether your hall allows clamping anything to its furniture. If the answer is no or unclear, it’s a riser.
Products, if you need any#
Optional, and only after the reset. The picks are in the sidebar, and here’s what to check on each. A desk riser lifts the screen and leaves storage underneath, so check its listed weight rating against your monitor. A cable kit with a sleeve, hook-and-loop strips and zip ties needs no adhesive; if it also comes with adhesive mounts, only use those where your hall permits adhesives.
For light, a freestanding LED lamp with a warm-white setting stands on its own, with nothing to clamp. If you have a monitor, a monitor light bar sits on top of it and lights the desk without taking any desk space at all.
Check before you buy anything#
- I’ve read my hall’s rules on adhesives, clamps, furniture and power strips.
- I’ve done the reset and know what’s actually missing.
- My notebook zone is still clear after this purchase.
- For an arm: VESA, weight, edge thickness and clearance all check out.
- It removes without tools or residue, or my hall explicitly allows it.
- It packs up easily at move-out.
How this page was put together: the dorm rules come from the housing and fire-safety pages of UMass Amherst, Mary Washington, Western Kentucky, Michigan Tech, Brown and Kutztown, and from the U.S. Fire Administration, all read on October 7, 2026, and linked where they’re cited. They’re examples to show how much rules vary, not a summary of your school’s. Product details come from each product’s listing and our existing reviews. The desk photos and the pictures of Mira are illustrations made for this page, not photos of real rooms.